
When we first moved in, the backyard was more of a dumping ground than a retreat. There was a pile of dirt behind the garage, a small fenced area for the dog, a swingset, and a scattering of trees. It didn’t feel inviting—but little by little, we transformed it into a place full of life, memories, and a personal oasis.
Stage 1: Making Do with What We Had
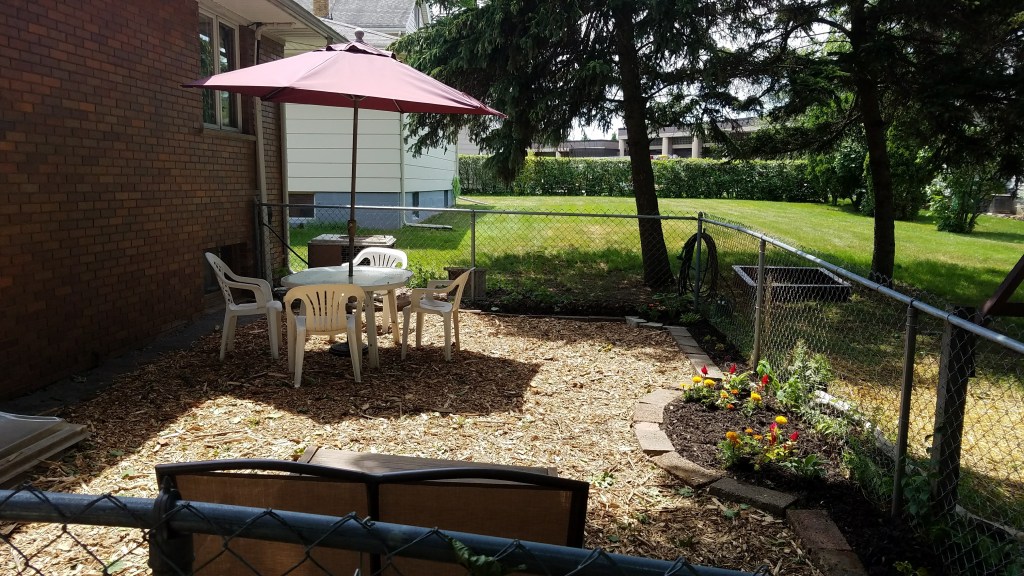
Our first project was leveling the dirt behind the garage so we could have a patio area. We used some old pallets to build up the edges of the area to make it level. We found some broken sidewalk pieces and used them as pavers to start forming a patio. We didn’t have quite enough, so we filled in with some gravel. We also acquired some cement blocks to make a firepit. The previous owner had left behind a little bistro table and chair. I found another iron chair and some adirondack chairs at a garage sale to complete the ensemble.

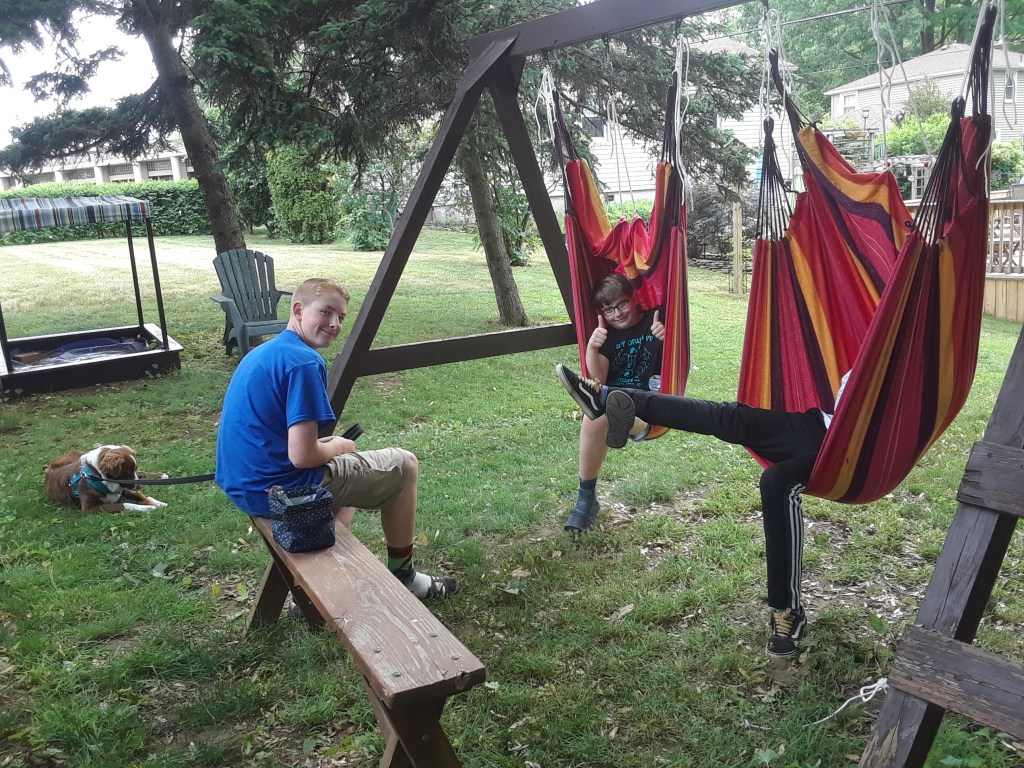
The old swingset came with rusty swings, but we wanted some hammock swings that both kids and adults could enjoy. Instead of getting expensive macramé swings, I found some woven hammocks for $5 each at Five Below and strung them up. The kids loved them and felt like they were in cocoons.
Even though the kids were older, I always enjoyed having a sandbox in the yard for when younger guests come over, so when I ran across a wooden one with a cute canvas cover at a garage sale, I just had to bring it home. It found a place under the pine trees.
Our dog Nikki’s area inside the fence was mostly weeds. Once in a while we would pull out all the weeds and put down a layer of straw. To help disguise the area, I planted a row of ferns (someone was giving away) bordered by driftwood found at the lake beach that softened the edges and made the space feel less of an eyesore..

Lessons Learned from Stage 1:
- The pallets to build up the edges to make the area flat were just a temporary fix and not the best solution. But we had just invested in the house and didn’t have extra money to do it properly.
- You don’t have to pay a lot of money to get the things you want for the backyard. Just keep your eyes peeled at discount stores and garage sales. Keep a running list of the things you are looking for, pray about them, and they will eventually find you if they are meant to be.
- Whenever you go to the beach, keep an eye out for driftwood you can use in the garden. You can often get ferns for free and they multiply rapidly and are great at softening chain link fences.
Stage 2: Remembering Nikki
After our dog Nikki passed away, we decided to reimagine the fenced area. We pulled out the grass, laid down mulch, and edged it with plants and pavers. We created a small memorial garden for Nikki’s ashes. I was sad to say goodbye, but I enjoyed being able to neaten up the area and using the extra space for entertaining.
We made a memorial stone for Nikki out of plaster of paris and colored glass pieces. That started us on an art project making stepping stones. We used glass river stones, pebbles, and broken dishware to create designs cast in cement.
We also enjoyed having art classes in the backyard making paintings to hang on the clothesline, painting rocks to use in the garden, or making hangings out of yarn and sticks we found in the yard.
The cute stepping stones really added whimsical character to the backyard, which also became a place to display the yarn hangings we made with the kids. Outdoors is not only a great place to make art out in the fresh air around a patio table, but also a fun place to display art, scattered through the garden or hanging from a canopy.

stepping stones, painted rocks, yarn hangings, and even kids’ paintings drying on the clothesline.
Lessons Learned from Stage 2:
- Kids love making art outside and it’s much easier to clean up the mess afterwards.
- Clotheslines make a great place to dry wet paintings, just remember to take them in before nightfall.
- Cement stepping stones take several days to dry, so plan a place in the garage where they can be undisturbed.
- Yarn hangings look very pretty hanging from tree branches blowing in the wind, but then can get tangled or blown down in wind storms or heavy rain, so take them inside if bad weather is in the forecast.
Stage 3: The Covid Concert Years
During Covid, the backyard took on a whole new role—our piano recital stage. Instead of renting a venue, I decided to create one in our backyard. It took a lot of research and planning to figure out how to build a retaining wall, what supplies to purchase, and where to find the muscles to do the job.

With the help of family, friends, and a lot of trips to Home Depot, we got it done in the spring in time for the annual piano recital. I brought my digital piano outside with a speaker and decorated the stage area with lots of plants.

I also added more flowering plants around the yard, learning which ones do best in the shade—hostas, bleeding heart, brunnera, and foxglove added pops of color here and there.
When it was time for the recital, parents and grandparents brought their camp chairs to sit in my backyard or the playground next door. Afterwards we enjoyed refreshments in my yard surrounded by greenery in the shade.

It was such a success that we did it again the next year. The third year we tried it, we ended up relocating due to poor air quality from Canadian wildfire smoke drifting into our area. After that I realized it was a lot of work to prepare the yard and host a recital, and it was easier to use my church auditorium. Still, I cherish the memories of those concerts, and now the patio we built is used for other gatherings.
Lessons Learned from Stage 3:
- If you’re going to build a patio yourself, get as much help as possible. Don’t do it alone. Even with help, my back ached for months afterwards from hauling gravel, pavers, and sand.
- It’s worth it to rent a venue for a recital rather than host it myself. It saves me a lot of time and effort. Then I can work on my gardens at a more relaxed pace, instead of racing to meet a deadline.
Stage 4: A Space for Molly
When Molly joined our family, the backyard adapted again.

We decided to expand the fenced area so she would have more room to run around. So we unhooked the chain link fence from its posts, swung it open, then added more fencing to enclose a larger area around the swing set. We also added a doggie wading pool to keep our furry friend cool in the summers.
Most of the kids being out of the house by now, the swingset became an outdoor plant hanger with occasional adult hammock swings for family gatherings. I put edging around the swing area and filled it with mulch to make it look neat.
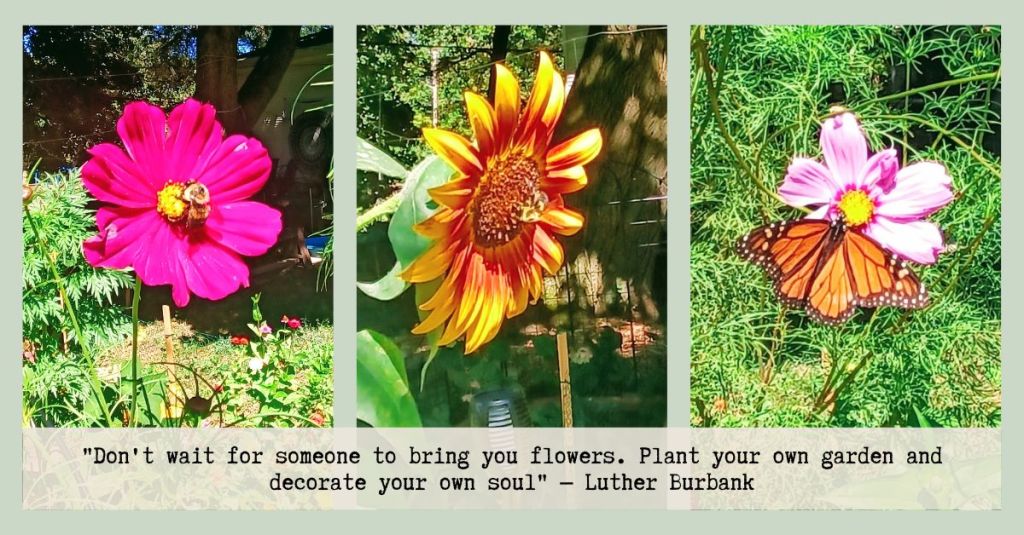
I tried adding a cut flower garden to the back border, planting sunflowers and cosmos. They struggled with attacks from bunnies and being sat on by Molly, but enough survived to get me hooked on cut flowers and want to grow more. (I’ll be posting about that soon.)
Lessons Learned from Stage 4:
- If you plant sunflowers, put a fence around them that the bunnies can’t get through. They love to munch on the sunflower seedlings and stalks.
- Don’t bother planting cut flowers inside a dog area. It will make you sad for losing flowers and needlessly mad at the dog.
Stage 5: The Greenhouse Saga
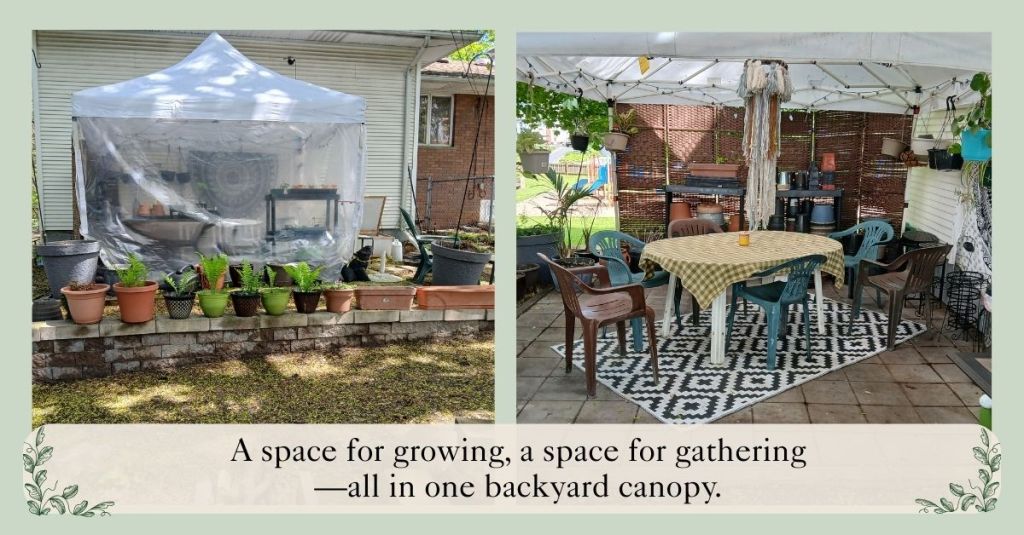
With my interest growing in cut flowers, I started many seeds and bulbs indoors that needed a place to harden off before putting them in the ground. So I decided to make my own greenhouse using a canopy. I purchased plastic sheeting and velcro to make the side walls and attached them to the canopy. I put some tables inside the “greenhouse” to hold the plants, and it worked very well.

Once I was done using it as a greenhouse, I removed the walls and added a table and chairs for a dining and relaxing area. Unfortunately, the replacement cover I had bought to replace the previous one that ripped wasn’t a good fit for the frame. It collected a lot of water during every rainstorm, and despite my efforts to support the cover and push out the water with a broom, it eventually came down with a crash during a particularly heavy storm.
In spite of the challenges of using a canopy as a greenhouse the first year, I decided to try again. This time I purchased a new canopy with a well-fitting, stronger cover. I reused the clear plastic walls I had saved from the previous year, but had to apply new velcro strips to the inside of the canopy to attach them. To keep the spring winds from blowing it away, I added extra sand weights to the poles.
It worked! The new canopy survived the whole season and served its dual purpose beautifully—first as a greenhouse in spring, then as a shaded dining and gathering area in summer.
Lessons Learned from Stage 5:
- If a canopy cover rips, just buy a whole new canopy. That way you are assured of a proper fit. A replacement cover costs almost as much as a new canopy anyway.
- If you live alone, like I do, ask another adult to help you put up the canopy. It’s pretty near impossible to do by yourself.
Stage 6: A Simple Pond
My pond started out as a wading pool for Molly. I added just a few plants that like to have their feet wet, like papyrus, an elephant plant, and even canna. The pool got so full of plants I had to buy another wading pool for Molly!
The elephant plant loved all the extra water and grew very large, even in deep shade. The papyrus struggled—it needs more sun.
The next year, I moved the pond out of Molly’s area into a slightly less shady garden where I also have a birdbath and birdfeeders nearby, so it has become part of the “Wildlife Area.” I also found a green wading pool to use instead of bright blue, so it blends in better. I put some larger rocks around it, and some river rocks inside.
I actually found a toad in the yard and put it in the pond, but he wanted to get out right away and couldn’t scramble up the slippery sides. So I stacked rocks like steps inside the pool so he could come and go. I haven’t seen him since, but I did find a large stone frog statue one of my kids left behind and added that to the pond.
I thought about getting goldfish to control mosquito larvae, but instead I added Mosquito Bitz to the water every so often, and that takes care of them.
Someday I would love to add a fountain for the soothing sound of water. Maybe next year. For now, I like having a pond I can disassemble in the fall and reassemble in the spring, changing it up each year. Next year I think I’ll keep it simple with just an elephant ear plant and several colorful caladiums. They love the water and are so beautiful. I’m hoping to winter over the ones I have and bring them back out in spring.

Lessons Learned from Stage 6:
- A pond doesn’t have to be permanent to be enjoyable—you can create one with simple materials like a wading pool.
- Elephant ears and caladiums thrive in the water, while papyrus needs more sun.
- If you want to welcome wildlife, add a rock “staircase” so frogs and toads can climb in and out.
- Mosquito control can be simple—Mosquito Bitz are safer and easier than adding fish.
- Sometimes the whimsical touches, like a stone frog statue, add as much joy as the real thing.
Stage 7: The Porch Swing Saga
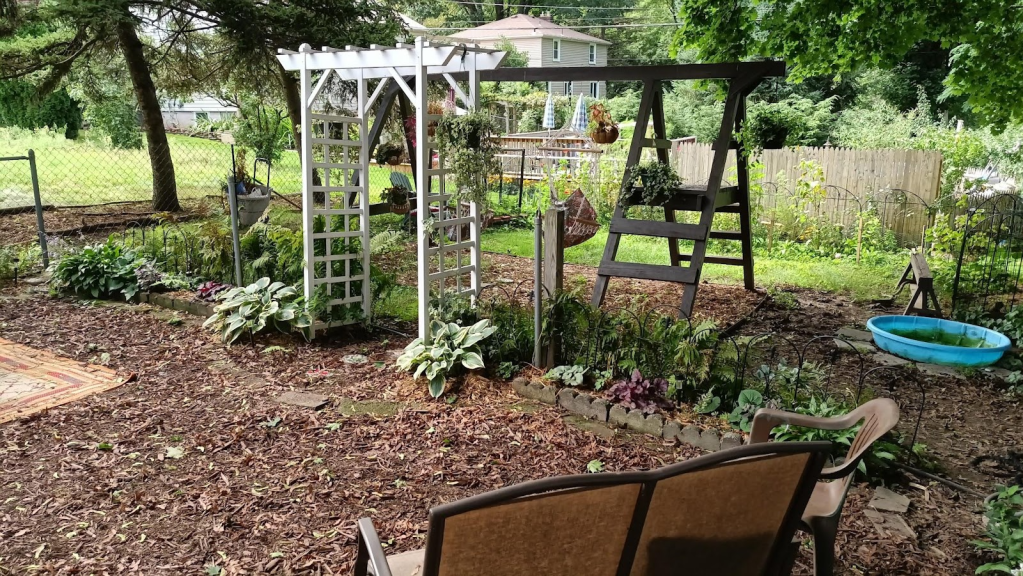
When I look out my piano studio window during weekday lessons, my eyes always wander to what I call the “courtyard” — the fenced-in part of the backyard where Molly roams. I’ve worked hard to make it aesthetic so I can enjoy the view while listening to students practice.
My gaze travels through the arch from my daughter’s wedding, nestled between rows of hostas and ferns, to the swingset beyond it decorated with hanging plants.
This year I became enamored with the idea of hanging a porch swing from that swingset. Not only would it add the cottage garden vibe I’m going for, but I could picture myself relaxing on it with pillows, a book, and a cup of tea.
New swings were too expensive, so I searched Facebook Marketplace and found a wooden one painted white for $40. My dad helped me pick it up, and though it needed a coat of paint, I decided to hang it right away. Shabby chic worked for me. I loved how it looked and how it lifted my spirits every time I saw it out my piano studio window.
But… the wood was older than I realized. It supported me just fine, so I assumed it would hold two people. I was wrong. We came crashing down, and the swing broke beyond repair.
I was sad for a few days, but I decided to salvage it. I jerry-rigged the pieces back together, placed it on top of an old picnic bench, and set it against the brick wall of the house. Now it serves as a charming bench planter. I still get the romantic aesthetic, even if I can’t actually swing on it.
Instead of replacing it, I ordered a boho hammock. It’s still in the bag, though — I’ve discovered gardeners are often too busy to lounge! But someday, I will.

Lessons Learned from Stage 7:
- Marketplace finds are fun and budget-friendly, but always check sturdiness and safety before use.
- Even when something breaks, it doesn’t have to be wasted—repurposing can bring new charm and purpose.
- A hammock may not have the same cottage vibe, but it’s a lot easier on the wallet than a new porch swing.
In Summary
- A backyard is not just a place for…
Shade plants and cut flowers.
A pretty view framed by a window.
A greenhouse in spring.
A summer home for houseplants.
A wildlife pond and birdfeeders.
Dogs to run, rest, and roam. - A backyard is also a place for…
Family gathered around food, laughter, and firelight.
Children swinging, digging, and making art.
Sisters, mothers, and friends sipping tea under the trees.
Even piano recitals beneath the open sky. - Ultimately, a backyard is a place…
To enjoy all the seasons.
Where broken dreams can be repurposed into beauty.
For healing, for growing, and finding peace.
For reminding us we, too, can become more than we were before.
May your backyard become as beautiful as your dreams.
Love,
Kristen
Discover more from The Shy Garden
Subscribe to get the latest posts sent to your email.
